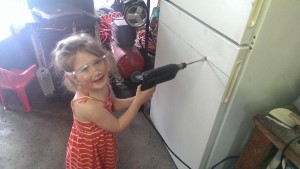
So let’s start from the very beginning. I acquired my HotPoint refrigerator from my neighbor. He had just received a new fridge and was moving his kitchen fridge onto his porch to replace his HotPoint fridge. He called me up and asked me if I wanted his old porch fridge. Once I determined that there was nothing wrong with it, I happily accepted.2
He wheeled it over on the dolly and I made room for it in the garage. It has served a great purpose as a second refrigerator, mainly for storing beer, but having the extra room to put stuff when we have no room in our main fridge was just an added treat.
I have wanted, for quite a while, to move away from bottling and into kegging in my homebrew operation. My wife and I have been looking at buying a new house for a little while now, but in order to prepare our current house for sale I needed to do something with all of the bottles I’ve collected over the years used to bottle my beers. I saw this as an opportunity and jumped on it! I told her that if I got the equipment to go down the road to keg, then I could get rid of all of my bottles. She took the bait, and I reeled her in. So here we are 2 year later, and I now have my 4 year old daughter drilling holes in the front of what is to be deemed project “4 taps, 3 testicles, 2 dudes, 1 goal” (at least for me. JJ’s on his own for a creative project name.). So I am going to go ahead and call out the joke that many others are thinking while reading this: “3 testicles, 2 dudes and 1 goal? What sort of operation are you running over there?” Now you can’t call it out, or else you’ll just humiliate yourself.
I managed to secure the following components for the hardware of my build:
1 – HotPoint Refrigerator.
4 – Chrome Beer Faucets with Knob
4 – 4 1/8″ Chrome Beer Shank
4 – Ball Lock Beer Coupler
4 – Ball Lock Gas Coupler
4 – 3/16″ Beer Hose 5ft
4 – 5/16″ Air Hose 5ft
1 – Double Gauge Co2 Regulator
1 – 10# Co2 tank
4 – 5 Gallon Ball Lock Kegs – Reconditioned, clean, pressure checked
4 – Extra O-Rings for Kegs (just in case)
1 – 1×4 Pine Board (I had this laying around in my garage already)
1 – Sheet of MDF (I had this laying around in my garage already)
Items to still obtain:
1 – Drip Tray
4 – Secondary Regulators
Tools Required:
Power Drill
Saw – Table saw would work best, unless it’s buried in the corner of your garage. Then just grab whatever saw you can get your hands on. In my case, it was a jigsaw.
3/16″ Drill Bit
7/8″ Step Drill Bit
1″ Spade Drill Bit
Channellocks.
Start off by determining where you want to place your taps. I did 4 taps and put the centers 5″ apart from each other. Draw a line across the door, mark your centers, and drill a pilot hole with the small drill bit. Once you’ve got the pilot hole drilled, drill out the tap holes with the step bit all the way to 7/8″. Originally I used a 3/4″ spade bit to drill the tap holes, but then had to go back and finish it with the 7/8″ step.

